
Acrylic nails are a popular cosmetic enhancement combining acrylic powder and liquid monomer to create durable, long-lasting nails. They offer versatility in design and finish, making them a favorite for those seeking both style and resilience.
What Are Acrylic Nails?
Acrylic nails are a type of artificial nail enhancement made from a mixture of acrylic powder and liquid monomer. When combined, these ingredients form a durable, long-lasting overlay that can be shaped and customized to match your natural nail bed or desired aesthetic. Unlike gel or dipping powder nails, acrylics create a strong, thick layer that is less prone to chipping or cracking. They are often applied over natural nails or nail tips to achieve the desired length or shape. This versatile option is ideal for those seeking a stylish, resilient nail solution that can be tailored to personal preferences.
Benefits of Acrylic Nails
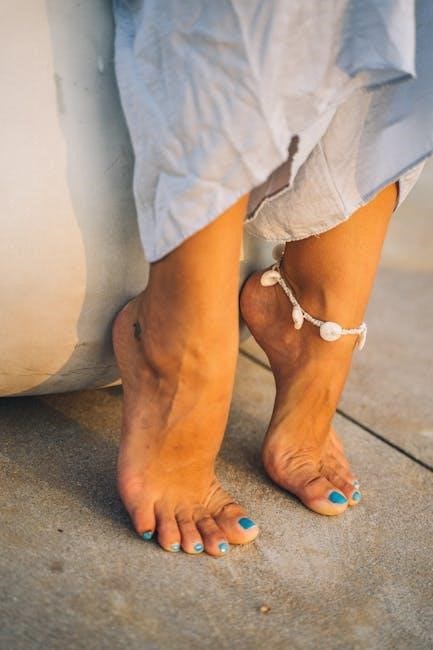
Acrylic nails offer numerous benefits, making them a popular choice for nail enhancements. They are durable and long-lasting, resisting chipping and cracking for up to two weeks with proper care. Acrylics provide versatility in design, allowing for various shapes, lengths, and artistic finishes. They are also a great solution for those with weak or damaged natural nails, as they add strength and protection. Additionally, acrylic nails are customizable to suit personal style, whether you prefer natural looks or bold, creative designs. Their resilience and aesthetic appeal make them a favorite for special occasions or everyday wear.

Preparation for Acrylic Nail Application
Preparation is key for a successful acrylic nail application. Start by cleaning and shaping your natural nails, ensuring they are free of oils and lotions. Remove old nail polish thoroughly and gently push back your cuticles. Buff the nail surface lightly to create a rough texture for better adhesion. Sanitize your hands and nails to prevent infections. Proper preparation ensures a strong bond between your natural nails and the acrylics, promoting a long-lasting and flawless finish.
Cleaning and Shaping Your Natural Nails
Cleaning and shaping your natural nails is the first step in preparing for acrylic nails. Start by removing any old nail polish using a nail polish remover. Wash your hands thoroughly to sanitize them. Use a lint-free wipe or cotton ball soaked in nail cleanser to remove oils and residue from your nails. Next, shape your nails using nail clippers and a nail file. Trim and file your nails to your desired shape, ensuring they are even and smooth. Avoid cutting too short, as this can cause discomfort. A clean, dry, and properly shaped nail surface is essential for a strong acrylic bond.
Removing Old Nail Polish and Preparing the Nail Surface
Removing old nail polish and preparing the nail surface is crucial for a successful acrylic nail application. Start by using a nail polish remover to completely strip any existing polish from your nails. Once the polish is removed, use a lint-free wipe or cotton ball soaked in nail cleanser to remove any oils or residue. Gently roughen the nail surface with a nail file to create a better bond between your natural nail and the acrylic. Ensure your hands are washed with soap and water beforehand to maintain a clean and sanitized environment for the application process.

Tools and Materials Needed
The essential tools and materials for acrylic nails include acrylic powder, liquid monomer, nail tips, nail glue, a nail brush, nail files, buffers, nail cleanser, primer, cuticle oil, orange sticks, UV lamp, base coat, top coat, lint-free wipes, nail art brush, and a dappen dish to mix the acrylic.
Essential Items for a Successful Acrylic Nail Application
For a successful acrylic nail application, you’ll need acrylic powder, liquid monomer, nail tips or forms, nail glue, a nail brush, nail files, buffers, nail cleanser, primer, cuticle oil, orange sticks, a UV lamp, base coat, top coat, lint-free wipes, and a dappen dish to mix the acrylic. These tools ensure proper preparation, application, and finishing for long-lasting, professional-looking nails. Having all items ready beforehand streamlines the process and helps achieve a flawless result.

Step-by-Step Application Process
The acrylic nail application process involves several key steps to achieve professional results, including nail preparation, mixing the acrylic, application, shaping, and finishing touches.
Mixing the Acrylic Powder and Liquid Monomer
Mixing acrylic powder and liquid monomer is crucial for the application process. Start by pouring a small amount of liquid monomer into a dappen dish. Gradually add acrylic powder, stirring until a smooth, thick paste forms. The consistency should be similar to honey; if too runny, add more powder, and if too thick, add a little monomer. Use a clean brush to mix thoroughly, ensuring no lumps remain. This mixture is then applied to the nail surface using the brush, creating the desired shape and structure. Proper mixing ensures durability and a professional finish. Always follow safety guidelines when handling these chemicals. Remember, the ratio of powder to liquid is key to achieving the right consistency. Practice makes perfect in mastering this step. Ensure the mixture is used immediately to prevent hardening. Never mix more than needed, as it can harden quickly. Keep the workspace well-ventilated to avoid inhaling fumes. Always refer to the product instructions for specific mixing ratios. Mixing correctly is the foundation of a successful acrylic nail application. Take your time to get it right, as this step significantly impacts the final result. With practice, you’ll achieve a smooth, even mixture every time. Nail technicians often recommend starting with small amounts and gradually adding more as needed. This helps maintain control over the mixture’s consistency. Once mixed, apply immediately to avoid wasting product. Proper ventilation is essential to ensure a safe working environment. Always prioritize safety when handling acrylic chemicals. The key to a flawless application lies in the mixing process. Mastering this step will elevate your acrylic nail game. Remember, patience and precision are vital for achieving professional results. Happy mixing!
Applying the First Layer of Acrylic
Dip your brush into the mixed acrylic, wiping off excess on the rim of the dish. Gently pat the brush over the nail surface, starting at the center and spreading outward. Ensure full coverage, avoiding the cuticles. Use light pressure to press the acrylic into place, smoothing any bumps. Repeat as needed for an even coat. If excess seeps onto the skin, wipe it with a lint-free wipe; This layer sets the foundation, so take care to create a smooth, even base. Allow it to harden slightly before proceeding to the next step. Remember, a steady hand and patience are key. Ensure the first layer is thin to prevent cracking. Always keep the brush clean and dry between applications. Never apply too much acrylic at once, as it can lead to unevenness. Take your time to achieve a flawless base layer. This step is crucial for the durability and appearance of your acrylic nails. With practice, you’ll master the technique of applying the first layer seamlessly. Keep the workspace well-lit to monitor your progress. Always refer to professional guidelines for the best results. Nail art enthusiasts often emphasize the importance of this step. Once the first layer is applied correctly, the rest of the process becomes much smoother. Don’t rush—precision is key. Let the layer set before moving on. Acrylic nails require attention to detail for a professional finish. Mastering this step will enhance your overall results. Remember, consistency is the goal. Take a deep breath and enjoy the process!
Shaping and Buffing the Nails
Shaping and buffing are essential steps to achieve a polished, professional finish. Use a nail file to carefully shape the acrylic nails to your desired form, ensuring smooth edges. Next, employ a buffer to gently smooth the surface, removing ridges and blending the acrylic with your natural nail. Start with a coarse-grit buffer for shaping and switch to a fine-grit for a glossy finish. Be cautious not to over-buff, as this can weaken the nail. After buffing, wipe away dust with a lint-free wipe. This step enhances durability and ensures a seamless, natural-looking result. Proper shaping and buffing are key to a long-lasting, salon-quality finish. Always work gently to avoid damaging the nail or surrounding skin. Use a light touch for buffing to prevent overheating the nail. Remember, a well-shaped and buffed nail is both visually appealing and more durable. Take your time to perfect this step for a professional look. Nail art enthusiasts often highlight the importance of this process. Once complete, your nails will have a high-gloss finish and a natural appearance. Don’t skip this step, as it ensures a flawless outcome. Acrylic nails require careful shaping and buffing for optimal results. Mastering this technique will elevate your nail game. Keep your tools clean and organized for the best experience. Practice makes perfect, so don’t be discouraged if it takes time to get it right. Your patience will pay off with beautiful, professional-looking nails!
Finishing Touches and Top Coat
After shaping and buffing, apply a thin layer of top coat to seal and protect your acrylic nails. Choose a glossy, matte, or UV finish based on your preference. Use a lint-free wipe to remove any excess polish or dust. Allow the top coat to dry completely for a durable, chip-resistant finish. For a polished look, clean up around the cuticles with a cotton swab dipped in nail cleanser. Moisturize your cuticles to keep them hydrated. Avoid using harsh chemicals or detergents to prevent weakening the acrylic. Your nails are now complete, with a professional and long-lasting finish. Remember, proper aftercare ensures the longevity of your acrylic nails. Keep your nails clean and dry to prevent lifting. Enjoy your newly enhanced nails with confidence!

Caring for Your Acrylic Nails
Keep your acrylic nails clean and dry to prevent lifting. Avoid harsh chemicals or detergents, as they can weaken the adhesive. Moisturize your cuticles regularly to maintain healthy nail growth and prevent brittleness. Regular touch-ups every two weeks are essential to maintain the appearance and longevity of your acrylic nails. Avoid using your nails as tools to prevent chipping or damage. Gentle care ensures your acrylic nails remain intact and look their best for a longer duration.
Tips for Maintaining Long-Lasting Acrylic Nails
To keep your acrylic nails looking their best, avoid exposure to harsh chemicals or detergents, as they can weaken the adhesive. Keep your nails dry to prevent lifting and ensure proper adhesion. Moisturize your cuticles regularly to maintain healthy nail growth and prevent brittleness. Gently file any rough edges to avoid chipping or cracking. Apply a top coat weekly to seal and protect the acrylic. Protect your nails from extreme temperatures and avoid using them as tools. By following these tips, you can enjoy long-lasting, flawless acrylic nails while maintaining the health of your natural nails.

Common Mistakes to Avoid
Avoid improper preparation, using low-quality products, and not following instructions. Never use nails as tools and avoid exposure to harsh chemicals. Ensure proper aftercare and timely touch-ups for durability.
How to Prevent Damage and Ensure a Flawless Finish
To prevent damage, avoid using nails as tools and keep them away from harsh chemicals. Apply a base coat and top coat for protection; Regular touch-ups prevent lifting and cracking. Moisturize cuticles to maintain nail health. Use high-quality products and follow application instructions carefully. Avoid excessive filing or buffing, which can weaken nails. Proper aftercare ensures a flawless finish and extends wear. Consider professional application for best results, especially for those new to acrylic nails.
Removal and Aftercare
After removing acrylic nails, moisturize your nails and cuticles to restore health. Avoid harsh chemicals and give nails a break before reapplying acrylics for optimal recovery and strength.
Safe Removal of Acrylic Nails and Post-Removal Nail Care
Safe removal of acrylic nails involves soaking them in an acetone-based remover to soften the acrylic. Gently scrape off the material with a wooden stick to avoid damaging your natural nails. After removal, moisturize your nails and cuticles with a nourishing oil or cream to restore hydration. Avoid using harsh chemicals or filing your nails excessively. Apply a nail strengthening base coat to help repair and restore nail health. Give your nails time to recover before reapplying acrylics to ensure long-term nail integrity and prevent damage;
Leave a Reply
You must be logged in to post a comment.